I was able to get a lot of crafting in this past month or so, yay! I'm going to pack a lot into this post so you can see what I've been up to. Sit back, grab a cup of tea or coffee, and enjoy.
HAPPY NEW YEAR!
I wanted to send out a few New Year's cards, but searching the crafts stores both on-line and off brought me nothing. Leave it to Dawn to find this adorably perfect stamp! There was a lot of fussy cutting, paper piecing, coloring and Stickles involved, about 3 days' worth of fun. Each one was different because I had specific people in mind. I wanted to get
the hair and even the pets just so. I failed miserably at the pets,
though, I should have shopped better for those, but maybe I caught the
essence anyway.


I stamped the girls using black Staz-On, but upon reflection I wish I had embossed them for a more polished finish. I placed pop dots under the little girls so they stand out from the
background and gave each one a tiny companion. The inside sentiment was
embossed with detail black embossing powder and also popped up. Each banner
is backed with a matching piece of card stock from the front. The stars
were cut from sparkly paper using a die with my Vagabond. I inked the
edges to give them depth.
My daughters puffed my chest by telling me they were little works of art
and I couldn’t give them away, I should frame them, and would I make
them a couple to keep. They’re so good for my ego. (More
photos and details on my flickr.)
A YEAR'S WORTH OF LOVE IN CARDS!
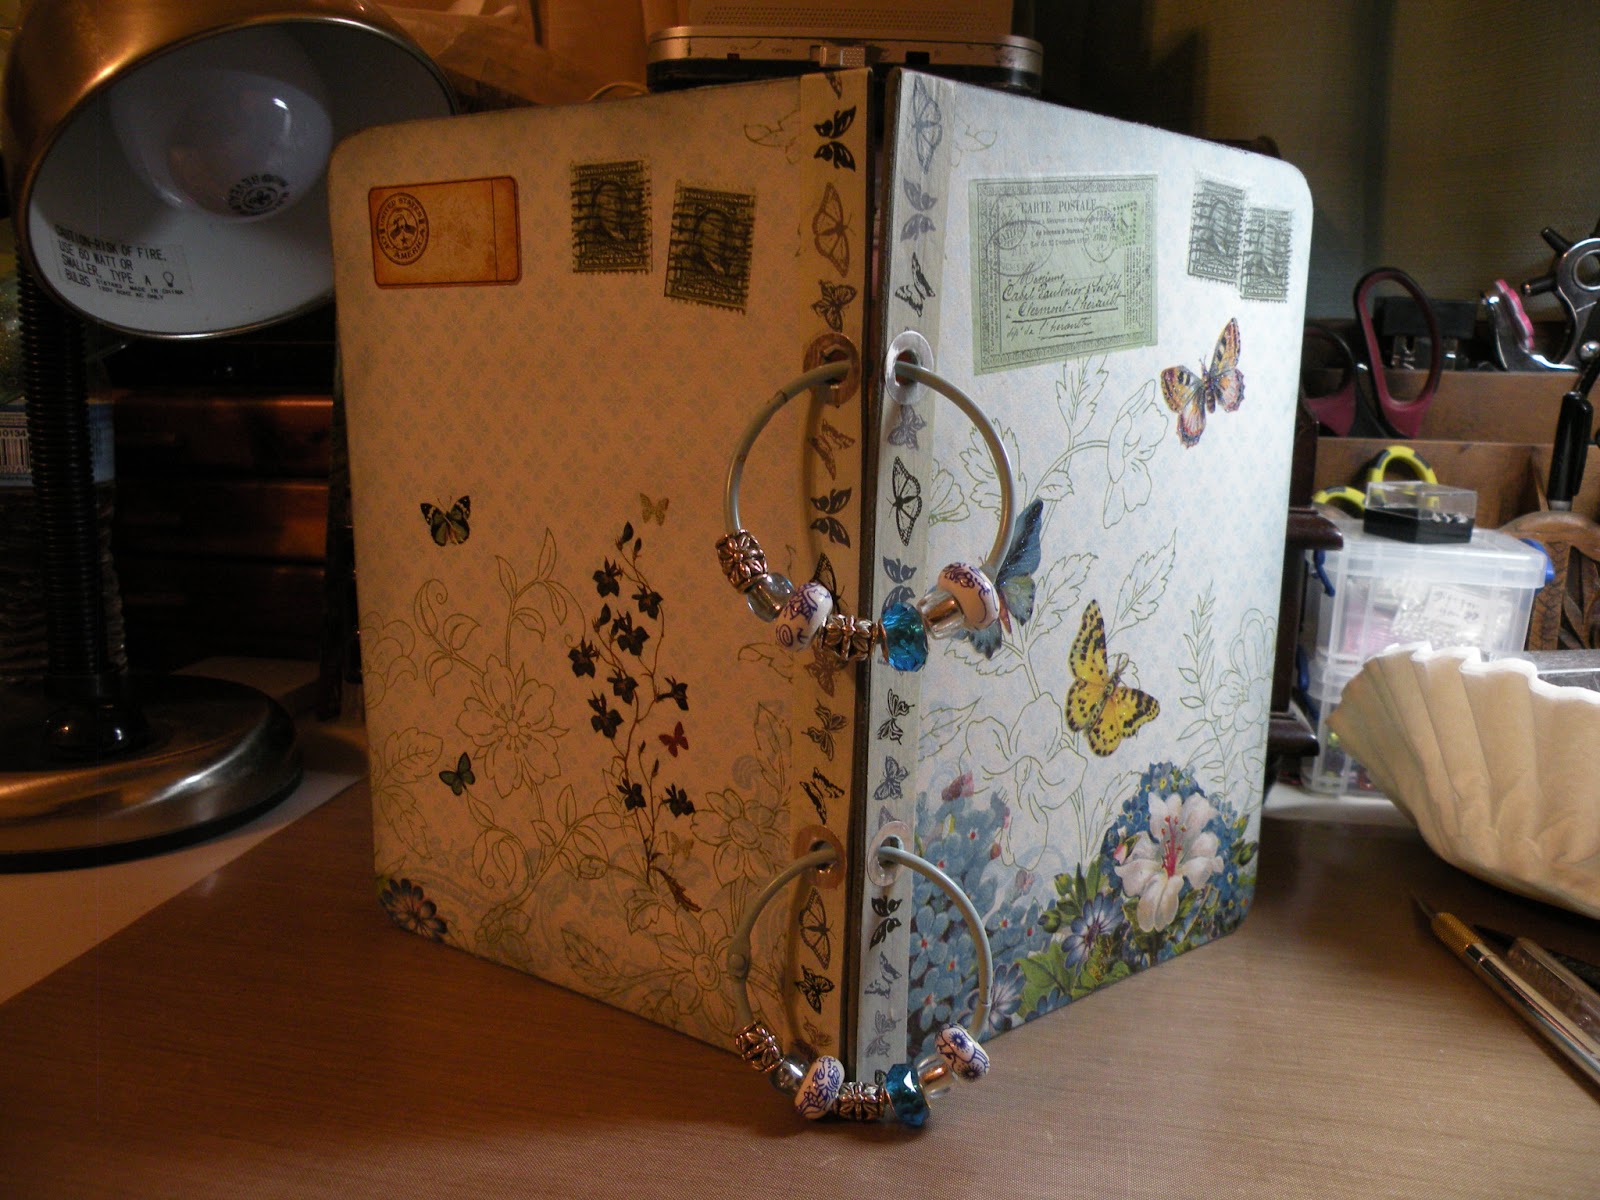
Since my card-holder was filled to the brim...
I made myself another one.
I’m normally not one for the frou-frou, but a friend of ours gave me
3, 12”x12” stacks of some pretty gorgeous paper for Christmas and I just
had to use some of it. I’ve always liked butterflies, so I chose
two pieces that compliment one another. Also, the sparkly ones drew me
in.
I embellished the pages with rub-ons, stickers and Washi tape and
inked the edges with a subtle blue. I added pockets to the inside adding
the word “memories” on one and cutting a square of the same pretty
cardstock for the other. My daughters have given me lots of beads lately
and they’re perfect for this project. I'm excited because my husband liked it enough to ask me to make one for him! (More
photos and details on my flickr.)
HAPPY ANNIVERSARY, MARTHA AND LARRY!
I made my sister and her hubby an anniversary card using some adorable prints Dawn gave me. Again, my ninja paper-cutting skills came in handy, especially on the tiny duckling. They loved it
FIRST CROCHET IN LIKE FOREVER
Around Midnight on Christmas Eve
I came across
this free PDF pattern for a dish cloth and tracked it to a site called
Tangled Yarn. I hadn't crocheted in a couple of years, probably, or at least haven't made anything. I thought, I could do that, and so I did. It called for a triple crochet, and because I hadn't done it in such a long time I had to look it up on YouTube. It's a bit wonky, but my sister Martha liked it. As a matter of fact it reminded her she wants to re-learn crocheting this year, so the other day we sat down and I showed her how to make a chain. One step at a time.
THINK PINK!
My sister-in-law is a 4-time cancer survivor. The second type was breast
cancer, which resulted in the removal of her left breast. She collects
all things pink ribboned and is decorating a small tree with this theme
in mind.
We went to Michael’s and she picked out a
packet full of lovely breast cancer awareness crafting fodder because
she wanted me to make some rosettes for it.
I gave her back the kit when
I dropped them off so she could finish them off at the center the way she
liked. Besides, that’s the fun part. Here are a few of the photos she texted me. Beautiful!
HAPPY BIRTHDAY, DENI!
I made my hubby a birthday card with a gift/present theme. I cut out his name with a die using my Vagabond. You can't see it in the photo, but I sparkled up the lettering with a glitter-type pen. I cut out some presents, popped them up and added the letters to each one.
I also cut the sentiment from a birthday die and added it to the inside. The little gift in the corner is also popped up with a pop dot.
There were a few other things I made, but I'm making this too long as it is.
I love crafting and have fallen in love with card-making. I hope to hone my skills and pick up some speed. I spend a lot of time on each card, maybe too much. But when I'm making a card I'm thinking of the one who will be receiving it, so I want to make it as perfect as possible. Not because I want accolades; I want the recipient to know they are special and worth the time and extra effort I put into the card they are holding in their hand so they can feel the love that goes along with it.
Note: If you would like to see more photographs and explanations of the crafts I make, please see my flickr.




 Posts

