I saw a brief video on Facebook (I can't share the link because all it does is bring you to your sign-in page) on how to make a wreath using paper bags. They used plain white bags with no folds at the bottom. I was curious if you could make one out of regular lunch bags, so I searched and found another video on YouTube by Secret Soto showing just that. I couldn't wait to make one. I went to the pantry knowing we had several packs of printed paper bags in several colors from the Dollar Store, so I chose the red ones.
The crafter in the YouTube video put glitter along the edges of her bags, but I couldn't wait, so I used a silver Sharpie pen. The glitter is much more awesome, but this isn't bad looking for a first try.
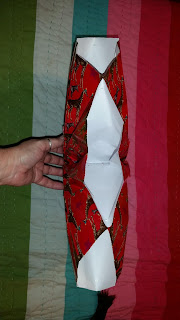
Below is what the bags looked like after gluing them all together. When I stretched it open, I felt the glue (a super strong glue stick) wasn't strong enough to adhere to the glossy paper, so I ended up stapling it to reinforce it.
I found a rosette I had made a long time ago in my craft stash and put it smack dab in the middle. I love the design the folds of the bags make at the center.
Below is a photo of my wreath with a 12" ruler to show you how humongous it is.
And this is what it looks like from the side. I'm not sure how long it would stay puffy if you were to hang it on your door, but I would imagine you could stuff it with tissue paper to assure that it remains full. And I realized the next day I forgot a step, cutting the ends to make it look more like a snowflake rather than one giant rosette. That's okay, I still like it.
You really must try this. It's one of the easiest crafts I've ever done.


That is really cool!
ReplyDeleteThank you, I just wish I hadn't forgotten to cut the edges, dern it.
ReplyDelete