I had such fun dressing up these giant wooden buttons I found at Michael's for only 29-cents a piece! After fighting with the equally giant labels on the back of them (it took like half-an-hour to get all the sticky off), I finally managed to create a nice clean surface.
I challenged myself to make each one different, so I had to dig out my thinking cap. The first one was a no-brainer. I used some sparkly candy-print card stock on both sides.
The first thing I did was ink the wood with Adirondack's Watermelon, especially around the edge, so it would match the paper.
The card stock was adhered using Glossy Accents on both the wood and paper for a more secure hold.
I really like how this turned out. I mean, who doesn't like sparkly candy?!
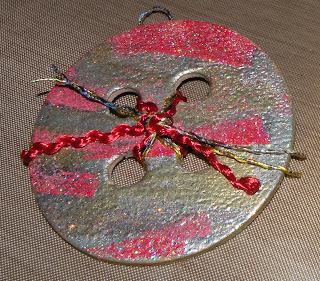
The second one started out with different inks. I just dabbed here and there, then added some Color Shine to it. I thought it would make a nice background for the rhinestones I wanted to cover it with.
But it was just okay, and I didn't like it, so I decided to go another route. I love working with embossing powders and that's what I used here.The back is black metallic and feels like rubber, it's pretty nifty.
This button is covered in Washi tape and was a lot of fun to do. It was a very simple process and I could probably make dozens more, I liked it so much.
I simply laid the tape down, overlapping just a tad bit. When it was in
place I turned it over and trimmed the edges then did the other side, this time in blue. When that was in place I cut out the center
circles. I added a hanger to it by placing it on the blue side and putting another piece of tape over it. I gave both sides a couple of coats of Mod Podge Hard Coat and I'm very pleased with the result. You can use regular Mod Podge, but I don't like the tackiness it leaves behind. The hard coat formula is my favorite because it leaves a smooth, non-sticky finish.
All tied up with a pretty pink bow made of vintage seam binding.
For the last button I used fabric cut from an upholstery book. I laid down a layer of Mod Podge Hard Coat, placed the fabric on top of the wooden button, then covered the fabric in another layer of Mod Podge. I used my embossing gun to help the drying process because I was anxious to finish it. It dried to a nice hard surface, better than I thought possible.
I used my Cropadile to punch the holes and finished enlarging them with my craft knife.
A piece of natural twine was used for the hanger which I tucked behind the fabric on the back. The bow was made using vintage seam binding. I love the feel of this old stuff, so silky, and it makes such pretty bows.
The back bow is just as cute as the front. It looks like a tiny bow tie a man would wear.
I had fun challenging myself to try different things with these. My daughter Valerie said I could go crash her stash of wood things, so I'm excited to see what else I can cover.
Subscribe to:
Post Comments (Atom)


No comments:
Post a Comment
Please be kind