Thursday, January 3, 2013

Lots Of Crafting Goin' On

I was able to get a lot of crafting in this past month or so, yay! I'm going to pack a lot into this post so you can see what I've been up to. Sit back, grab a cup of tea or coffee, and enjoy.

HAPPY NEW YEAR!
I wanted to send out a few New Year's cards, but searching the crafts stores both on-line and off brought me nothing. Leave it to Dawn to find this adorably perfect stamp! There was a lot of fussy cutting, paper piecing, coloring and Stickles involved, about 3 days' worth of fun. Each one was different because I had specific people in mind. I wanted to get the hair and even the pets just so. I failed miserably at the pets, though, I should have shopped better for those, but maybe I caught the essence anyway.

I stamped the girls using black Staz-On, but upon reflection I wish I had embossed them for a more polished finish. I placed pop dots under the little girls so they stand out from the background and gave each one a tiny companion. The inside sentiment was embossed with detail black embossing powder and also popped up. Each banner is backed with a matching piece of card stock from the front. The stars were cut from sparkly paper using a die with my Vagabond. I inked the edges to give them depth.
My daughters puffed my chest by telling me they were little works of art and I couldn’t give them away, I should frame them, and would I make them a couple to keep. They’re so good for my ego. (More photos and details on my flickr.)
A YEAR'S WORTH OF LOVE IN CARDS!
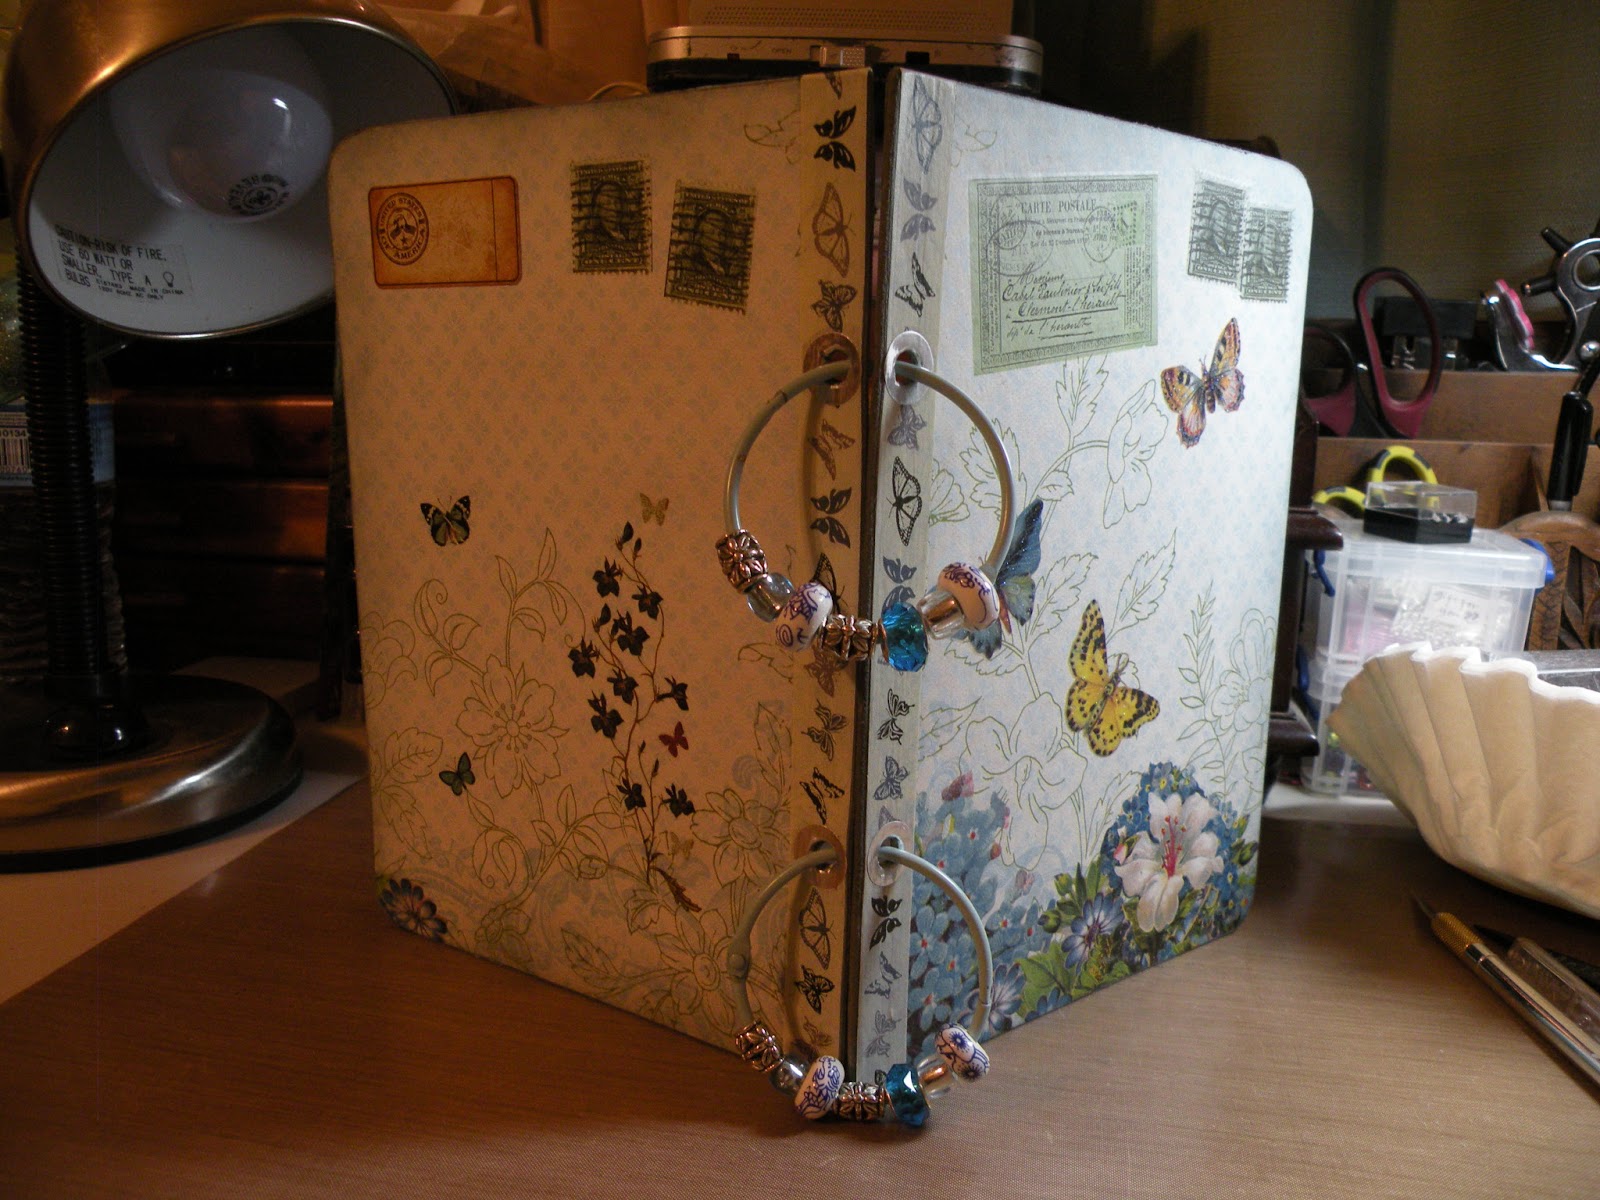
Since my card-holder was filled to the brim...
 I made myself another one.
I’m normally not one for the frou-frou, but a friend of ours gave me 3, 12”x12” stacks of some pretty gorgeous paper for Christmas and I just had to use some of it. I’ve always liked butterflies, so I chose two pieces that compliment one another. Also, the sparkly ones drew me in.
I embellished the pages with rub-ons, stickers and Washi tape and inked the edges with a subtle blue. I added pockets to the inside adding the word “memories” on one and cutting a square of the same pretty cardstock for the other. My daughters have given me lots of beads lately and they’re perfect for this project. I'm excited because my husband liked it enough to ask me to make one for him! (More photos and details on my flickr.)

HAPPY ANNIVERSARY, MARTHA AND LARRY!
  
I made my sister and her hubby an anniversary card using some adorable prints Dawn gave me. Again, my ninja paper-cutting skills came in handy, especially on the tiny duckling. They loved it
FIRST CROCHET IN LIKE FOREVER
Around Midnight on Christmas Eve I came across this free PDF pattern for a dish cloth and tracked it to a site called Tangled Yarn. I hadn't crocheted in a couple of years, probably, or at least haven't made anything. I thought, I could do that, and so I did. It called for a triple crochet, and because I hadn't done it in such a long time I had to look it up on YouTube. It's a bit wonky, but my sister Martha liked it. As a matter of fact it reminded her she wants to re-learn crocheting this year, so the other day we sat down and I showed her how to make a chain. One step at a time.
THINK PINK!
My sister-in-law is a 4-time cancer survivor. The second type was breast cancer, which resulted in the removal of her left breast. She collects all things pink ribboned and is decorating a small tree with this theme in mind.
We went to Michael’s and she picked out a packet full of lovely breast cancer awareness crafting fodder because she wanted me to make some rosettes for it.
I gave her back the kit when I dropped them off so she could finish them off at the center the way she liked. Besides, that’s the fun part. Here are a few of the photos she texted me. Beautiful!
HAPPY BIRTHDAY, DENI!
I made my hubby a birthday card with a gift/present theme. I cut out his name with a die using my Vagabond. You can't see it in the photo, but I sparkled up the lettering with a glitter-type pen. I cut out some presents, popped them up and added the letters to each one.
I also cut the sentiment from a birthday die and added it to the inside. The little gift in the corner is also popped up with a pop dot.
There were a few other things I made, but I'm making this too long as it is.

I love crafting and have fallen in love with card-making. I hope to hone my skills and pick up some speed. I spend a lot of time on each card, maybe too much. But when I'm making a card I'm thinking of the one who will be receiving it, so I want to make it as perfect as possible. Not because I want accolades; I want the recipient to know they are special and worth the time and extra effort I put into the card they are holding in their hand so they can feel the love that goes along with it.

Note: If you would like to see more photographs and explanations of the crafts I make, please see my flickr.

Lights In My Window

I put some LED lights in my window above my craft table (2 years ago?), something I'd seen on-line only they were around a bed. The last month or so they began to go out one strand at a time. I was down to a single strand before my daughters treated me to four new boxes.

The magic is back, Jack!

Thursday, December 20, 2012

Monday, December 17, 2012

I'm A Winner!


I won this set of rubber stamps by commenting on a craft blog I follow on YouTube. Actually, I won 5 stamps, but one, an adorable image of a piece of wrapped candy, fell behind my dresser and I can't get to it, ugh. (I'm sorry, R.J.!) I didn’t even realize I was entering a contest. I usually try and leave comments on craft videos regardless if there is a contest or not, so this was a nice surprise.

Guys are rare in the crafting community and this one, R.J. Avery is just the nicest fellow and very talented. My daughter Dawn and I learn something from him just about every time we watch one of his craft videos.
I stamped the gingerbread with white embossing powder, but I wasn't happy with the result. I just so happened to have a 3-D embellishment of the same little guy only a little smaller. I popped him up directly on top of my stamp, which allowed the stamp to sort of highlight the sticker. I like the affect, and, good save! The inside sentiment is a sticker.
Isn't the mouse just the cutest little thing you ever did see?! I embossed him with black detail embossing powder and colored his sweater with a red glittery gel pen. There are two different patterns of Washi tape along the bottom, one on top of the other. I surrounded the mouse with opaque Christmas tree and snowflakes stickers. I used another sticker for the sentiment and added a couple of more snowmen.
The Christmas tree stamp is so pretty! I stamped it several times using clear VersaMark embossing ink and silver detailed embossing powder. I love the affect of the silver embossing powder, it's my favorite. The trees didn't show up as well as I wanted them to, so I colored them in with various shades of green colored pencil and gave the front a light coating of green ink with my Tim Holtz blending tool. I used the same silver embossing powder on the inside sentiment using one of the new stamps.
I've never been challenged to make a certain type of card, but I'd do it again, it was really fun. Thanks again, R.J., have a very Merry Christmas and a wonderful New Year!

Thursday, December 13, 2012

Aluminum

My daughter Stumbled me an Etsy seller, Recycled Souvenirs, who sells things made out of aluminum cans cut from craft dies, you know, like some of the ones I have. LIKE THE ONES *I* HAVE! I couldn’t get to the recycling bin fast enough to cut a few cans and give it a try! Surprisingly, I didn’t cut myself, yay.
 
It was fun figuring out which dies would look good in aluminum form and then seeing them come to life. To give you an idea of size, the bird cage is about 4-inches high. I learned a lot, mostly to be more observant as to which side should be the right side, and that a variety of soda cans would make for some interesting patterns. (But I only buy Coke, don’t know if I can sacrifice taste for the sake of crafting, haha!)
The cool thing about the dies is that they sort of bend the edges as they cut so they’re not sharp. Also, even though aluminum is pretty tough these are still fragile and bend quite easily. These would be great for card-making (of course!) scrapbooking, magnets, pictures, and other crafty-type things along those lines.

Check out the camera piece that Etsy seller has up, it’s what got me so excited. I don’t know who they are, but for all the trouble it takes to make these puppies they’re very reasonably priced.

Monday, December 3, 2012

Christmas Ornament Exchange


My daughters and I signed up for an ornament exchange and this is one of the ornaments we came up with. I'm having a lot of fun with the new Tim Holtz snowflake die!
 
I cut them all out, the girls folded them and attached the ends, and I pulled my hot glue gun out of its holster and went to work. Dawn made the finishing touches since these were actually her project. (She had another project half-way done and the epoxy didn't set right, so they were ruined. Que Plan B.)

  
Dawn also ordered wooden snowflakes and had them drill a hole at the top for ribbon.
 
She sprayed them with pearly and blue colored mist and attached them to the outside of her packaging.
 
Here's a shot of her bags tucked amongst some of the other fabulous ornaments that were brought. Mine are right in front of hers, the envelopes with the rosette and Washi tape.
 
Valerie's ornaments are in the green boxes with ribbon.

She made the most adorable yarn balls with knitting needles on them!
She started with a paper mache form that came with a gold hanger attached to it already, which was a great help. She painted on the glue a little at a time and wrapped the first layer of yarn over it in a circular pattern. The second layer was applied by putting glue directly on the strand of yarn and winding it around. This was very time-consuming, but well-worth the results.
The knitting needles were made with skewers cut in half. It took a bit of searching, but she found beads to fit the tips and glued them in place.
I already posted about my ornaments, but here are the stars I made in case you missed it.
I cut my stars from natural-colored card stock using a die and gave each star 3 layers of embossing powder and hit them with my heat gun. (I may have a few fingerprints left!) The center star was so tiny, though, I couldn't hold it to emboss it, so I cut it from some pretty sparkly paper, the same I used for the backing.
I wrapped each one with tissue paper and tucked them inside little gold office envelopes I had inked up to give it some age. I put Washi tape around it to make it look like a gift then added my handmade rosettes as a finished touch. I also put a strip of Washi tape on the back. At the party everyone was more interested in the tape than anything else because they had never heard of it...can you imagine? hahaha! It was neat to be able to be excited and tell them all about the wonders of this magical thing we are all hoarding nowadays.
Here's a photo of the other ornaments from the exchange (I stole it from my niece's Facebook!). So much talent!
Reindeer, two glass ornaments with curled paper, elf, snowman, little felt Russian doll (what a lot of work! I mean, they all were, but this was pretty intricate), ceramic critters, plastic form filled with snow, and then ours. It was a fabulous ornament exchange with some pretty fabulous women.

Saturday, December 1, 2012

Homemade Refrigerator Roll Dough

Making Clover leaf rolls is one of my proudest achievements in the kitchen. My go-to cookbook is an old Betty Crocker book, a just married gift from my bff, Lauri. It's battered and well-used, the best pages being the messiest. I highly recommend Betty's recipe (as well as other recipes found in this book, like the best peanut butter cookies in the entire world!). It's the closest thing to my dad's clover leaf rolls I can make.
I made a batch for Thanksgiving and they rose nice and high, the best I've ever made, I think.
 
A couple of days after Thanksgiving my daughters suggested I make more, but I told them they'd have to wait for Christmas. Well, I caved and whipped up another batch.
What's neat about this dough, besides the fact it makes A LOT of rolls, is that it keeps in the refrigerator up to 5 days. So I made some the other day and just now took the last of the rolls out of the oven. I made mini rolls and had enough left over to make a tiny cake-pan full.
I had some turkey breast, so I made myself a little sandwich from half of the pan bread. It was messy, the rolls separated because it was still warm from the oven, but I didn't care, the effort to keep it together was worth every bite! I wish this blog had smell-a-vision!