Showing posts with label Vagabond. Show all posts

Sunday, November 17, 2013

Had A Little Trouble Posting

Don't know why I couldn't sign into my Blogger account, but I'm finally back in!

I have been playing around with my embossing folders lately, which have been sorely neglected. I've used a few in my card-making, but I feel like I'm not doing them justice. So when I came across some flat, silver and gold sequins at Michael's, $1.99 for a package of a gazillion, I wondered if I could run them through my Vagabond. Would they crumble under the pressure?
To my pleasant surprise, it worked! I tried just about every embossing folder I own, it was so much fun!

A few days later I wondered if alcohol inks would work on them. Another success!


Aren't they fabulous?! I love how differently the colors look on the gold as opposed to the silver, and how much they look like metal.

I went back to Michael's for more (you know, in case they quit making them, ahem), and came across some good-sized hearts, so I bought a packet. The embossing worked great on them as well!


Now I'm on a kick of embossing everything I can think of that's flat enough to glide through my Vagabond. I did some small clear bags and was very pleased with them. They're difficult to photograph, but I'll see what I can do about that and throw some photos on here.

What shall I emboss next?

Thursday, December 13, 2012

Aluminum

My daughter Stumbled me an Etsy seller, Recycled Souvenirs, who sells things made out of aluminum cans cut from craft dies, you know, like some of the ones I have. LIKE THE ONES *I* HAVE! I couldn’t get to the recycling bin fast enough to cut a few cans and give it a try! Surprisingly, I didn’t cut myself, yay.
 
It was fun figuring out which dies would look good in aluminum form and then seeing them come to life. To give you an idea of size, the bird cage is about 4-inches high. I learned a lot, mostly to be more observant as to which side should be the right side, and that a variety of soda cans would make for some interesting patterns. (But I only buy Coke, don’t know if I can sacrifice taste for the sake of crafting, haha!)
The cool thing about the dies is that they sort of bend the edges as they cut so they’re not sharp. Also, even though aluminum is pretty tough these are still fragile and bend quite easily. These would be great for card-making (of course!) scrapbooking, magnets, pictures, and other crafty-type things along those lines.

Check out the camera piece that Etsy seller has up, it’s what got me so excited. I don’t know who they are, but for all the trouble it takes to make these puppies they’re very reasonably priced.

Wednesday, August 29, 2012

Shrinky-Dink-A-Do

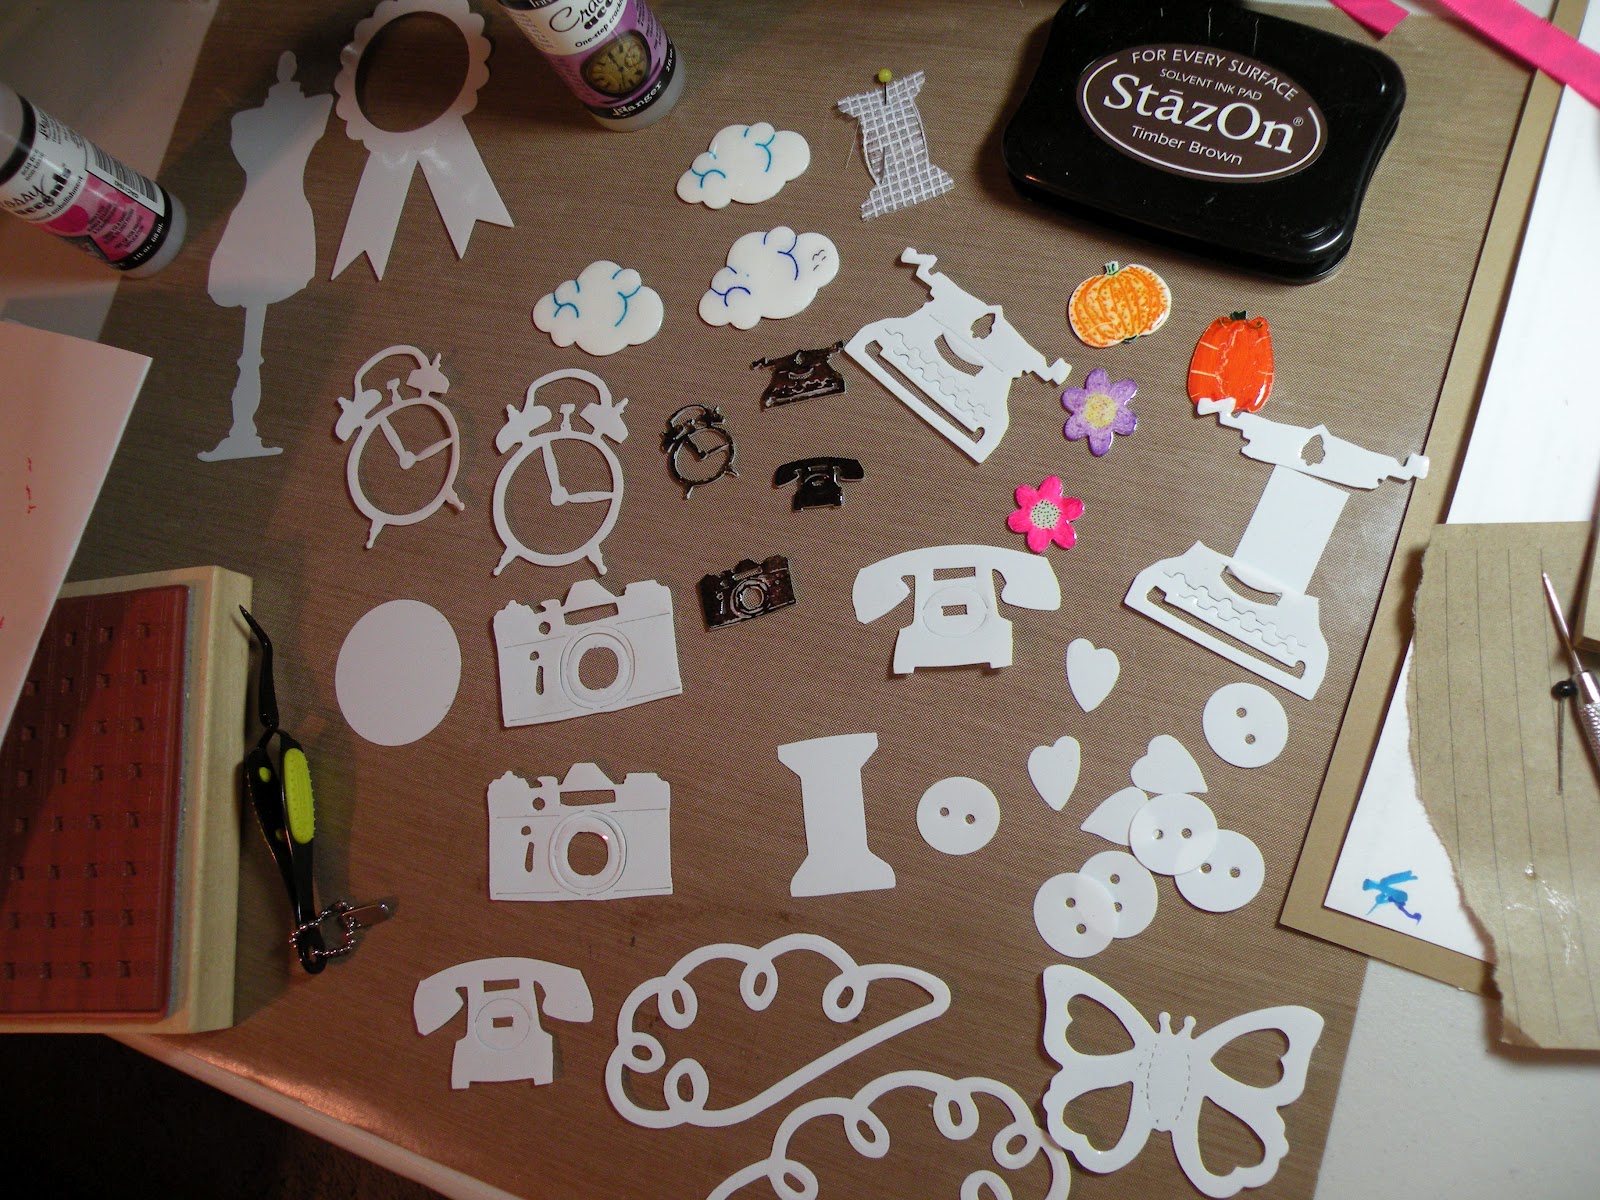
Here are some more gifts I made for my daughters' birthdays, this time using Shrinky-Dinks.

I cut all of the shapes using my Vagabond, stamped them with StayzOn ink and colored a few using Sharpies (it has to be permanent ink), then popped them in the oven for a few minutes.

I must admit, I was enthralled with the shrinking process and got really excited when things began to miniaturize. When they were cooled I applied a couple of coats of Glossy Accents, which made the colors even deeper and more vibrant.
As you can see from the above photo, the wings didn’t turn out, they curled up into themselves and I couldn’t get them untangled before they hardened. Maybe next time I'll try using my embossing heat gun.

My favorites are the camera, clock, phone, typewriter and sewing form. My daughter made the typewriter I gave her into a necklace and it looks darling. The sewing form, which took quite a bit of time, is a magnet for my other daughter’s fridge. The little measuring tape was made from Washi Tape, everything else is Shrink-Dink stuff. I applied pop dots to the backs of some of the other things like the clouds, pumpkins and butterfly so they can be used for scrapbooking.

I visited the Shrinky Dink Web site and discovered they sell colored and clear sheets as well (I used white), so I'm putting it on my birthday/Christmas list. I love getting crafts supplies as gifts so I can perpetuate the giving!

Saturday, August 11, 2012

I've Been Crafting


My daughter Dawn likes me to cut stuff with my Vagabond from unusual packaging. The above photo shows a few things I cut from the boxes of some McDonald's Disney glasses she had packed away. The flowers are my favorite. I've also made quite a few rosettes from cereal boxes, Coke can containers and a variety of candy boxes. It's a challenge to see what I can come up with for the centers. I don't know why I didn't take photos and post them here.


My sister Martha and her husband visited today. After we scarfed down the turkey crescent sandwiches, cucumber crack (chopped cucumbers, tomatoes and Feta cheese; I put it on everything!), and watermelon I served up, Larry watched TV in the living room and Martha and I retreated to my room where I guided her while she made a card for one of her closest friends. She doesn't craft much but was determined to do everything herself.


She layered card stock, stamped sentiments on watercolor paper, glued everything down using a tape snail thingie, which she isn't familiar with, a real challenge, but she met it! She also wielded a craft knife so she could slip a piece of pink ribbon through the top of the card, a big deal if you know my sister. She even inked the edges of the purple oval then used the corner chomper to round the edges of another stamped sentiment. It turned out lovely. Her crafty friend will love it, and when she finds out Marty did it herself she'll cherish it that much more.

What a great day with great people.

Thursday, May 10, 2012

Mother's Day, Happy Birthday & Get Well Cards

 
Although my mother is no longer of this world there are still many important women in my life. This year I let them know how much they mean to me.

I picked up a giant art book at Savers with the most beautiful images specifically for the purpose of using them for cards and scrapbooking. As soon as I saw this image I knew it would be for my sister. It reminds me of her and her daughter when she was about this age as well as our love of the ocean. I cut out the image, ran it through my die cutting machine, attached it to a piece of card stock after punching the corners with a frilly corner punch, and added a bow tied from vintage ribbon.
For the inside I cut 2 more pieces from the image (it was quite large), put strips of matching card stock at the center and stamped “Happy Mother’s Day.” I cut out the description of the painting located along the sidebar of the book and enclosed it with the card because sister likes stuff like that.

This is for my best friend. She's a do-it-yourselfer, so I chose this image of a woman doing some plumbing. It's cut from some wrapping paper I've had tucked away for eons.
I used an oval die, ran it through my Vagabond and stamped "Happy Mother's Day" at the center.

 
For my best friend's mother. She's like a second mom to me.


This one is for my awesome mother-in-law. I recently made her a birthday card and she was so thrilled with it she said she was going to frame it. For now on I need to live up to that expectation. No pressure. haha! I cut the ladies from a post card that came with a scrapbook order, used the lady button (one of several packages my daughter gifted me) and threaded it with twine. The polka-dotted paper was cut using my die cutting machine and then layered it with other papers.
I used the polka-dotted pieces left over from cutting the piece on the front to border the inside. I find it difficult to throw pieces like this away, so I'm always trying to use them up to justify the paper hoarder in me.
 
 
This is for my mother's best friend who is now in her mid-90s. My mom is gone now and so are her best friend's children. She's lost most of her family and friends, so I'm happy I can send this to her.
She'll love the buttons.
For my sister-in-law. I fussy-cut the edges of the card stock then applied it to the plaid. I used scraps from the 2-sided plaid card stock for added interest, fabric flowers attached with a pearl brad, and stamped the greeting.
She called me when she got it. One of her son's dogs got a hold of it when it was delivered through her front door and chewed a corner. I told her next time I'll hand-deliver it.

 
I made a couple more after I took the group photo. This was made for my sister's mother-in-law who used to sew up a storm. She's in her 80's now so she doesn't sew as much as she used to. The button portion of the card was cut from my daughter's Silhouette.
She's one of the sweetest women I have ever known.

 
This card was a challenge because it's going to someone who has lost both of her children. Mother's Day is bittersweet for her and I just wanted her to know I was thinking of her.

I also made a birthday card for one of my closest friends (I am blessed to have what I consider several life-long best friends!). I used one of my Sizzix alphabets for the first time. I cut her name out of a shimmery blue sticker-backed card stock.
I borrowed my daughter's banner punch, it's adorable! I used baker's twine to pull it together and a couple of tiny brads to attach the parchment paper sentiment. Another punch was used in the corner to cover up an uneven cutting. Another punch borrowed from my daughter, clouds, punched from silver reflective sticky-backed card stock.


The other night my daughter texted me and said one of her friends had surgery and would be off of work for a few days, so she was putting in an "order" for a get-well card. She said she liked purple. I had it finished by the time she got off work. Go me.

Father's Day cards next. My dad has been gone for eons, but there are still special men in my life and I want them to know it. Crafting for men can be challenging, but I'm up for it. I think.

Wednesday, April 25, 2012

Handcrafted Window Decals


We no longer have an ink jet printer (we have a laser), but I couldn't let go of the leftover ink jet window cling sheets we've had in our craft stash forever. So I experimented a little.

I knew it would work well with some of the dies I have for my Vagabond, but without color, why bother?

I thought about using permanent ink pads to stamp on it, but it wasn't practical, I only have black. (All the other colors I have are not permanent.) So I ended up pulling out my collection of colored Sharpies and scribbled on a piece to see if it was indeed permanent on this type of surface. It totally was!
 
So I scribbled a couple of more colors (lightest to darkest) on that piece and ran it through my Vagabond using a butterfly die. It's far from the great look a printer would lend, but it turned out better than I expected. Even the little hearts that punch out of the butterfly are pretty.
Next I used a bow die. It's officially adorable.
I'm looking forward to trying out other dies and colors.
  
In the end I would call this experiment of mine a success! Have you ever tried anything like this? I'd love to see the results!