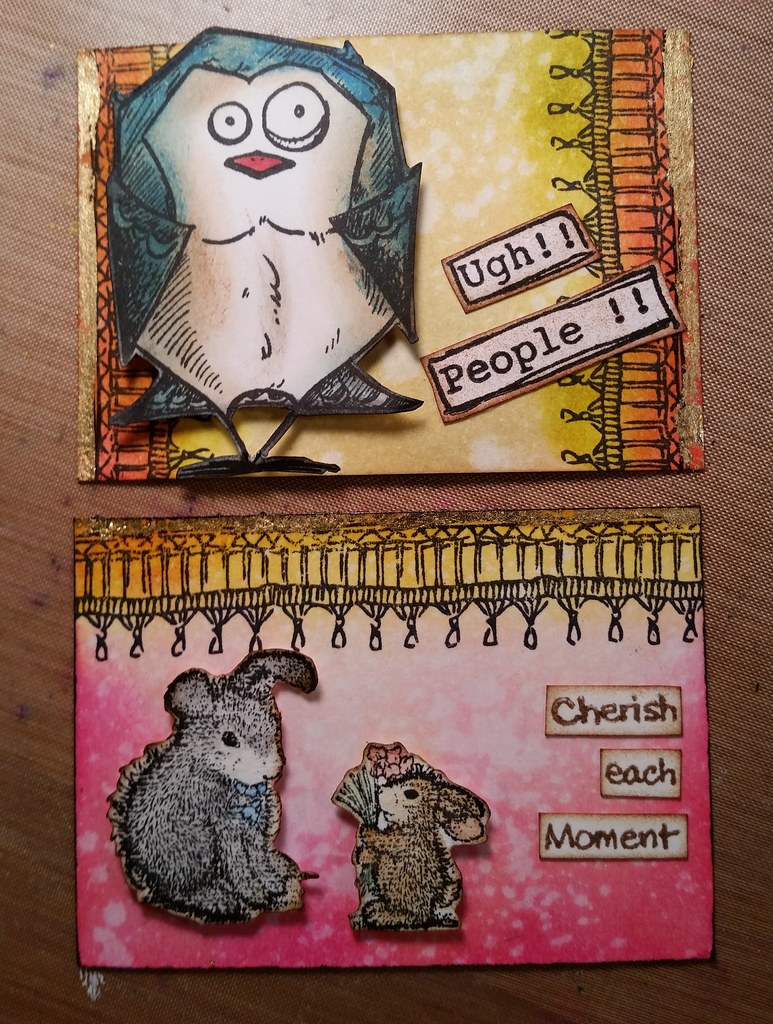
My daughter Dawn and I did our first Artist Trading Card (ATC) collaboration!
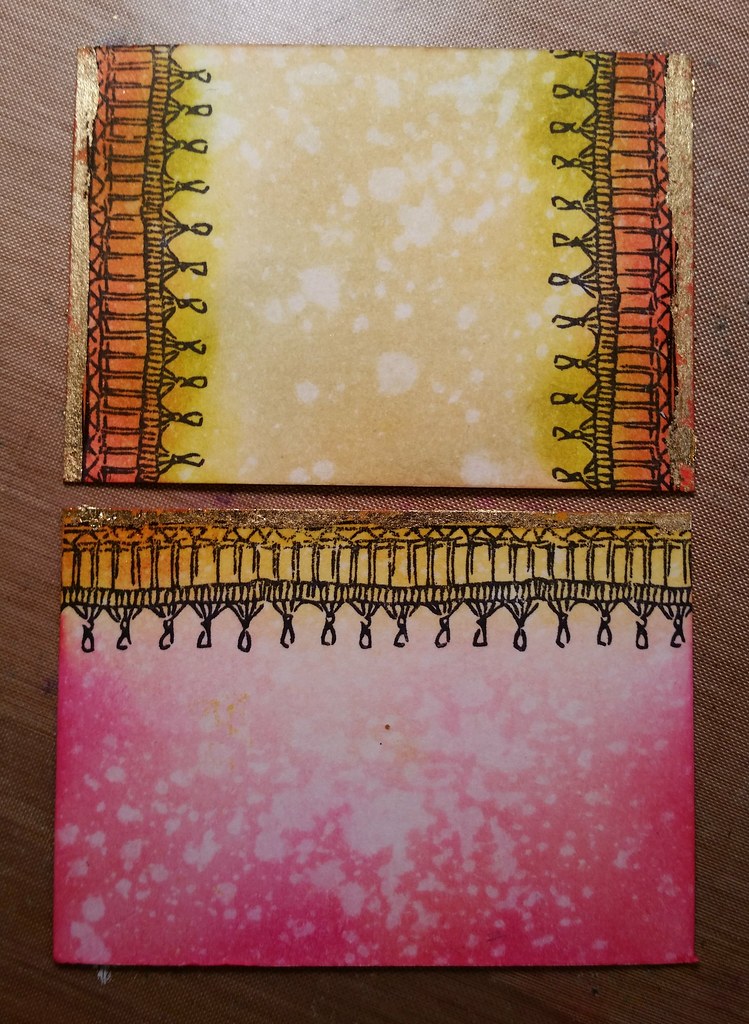
Dawn created the background with the amazing technique we learned from Tim Holt's Creative Chemistry Class-3. She brought them to me and said, "Now that I've done this I don't know what to put on them. You're good at that, here."
I was nervous at first because I didn't want to ruin her beautiful art. It took me a bit to come up with ideas, but after rifling through my die cuts and stamps, I came up with these. She kept the bird, I kept the other one. Maybe next time we do it, I'll do the background and she can put the other side of her creative brain to work.
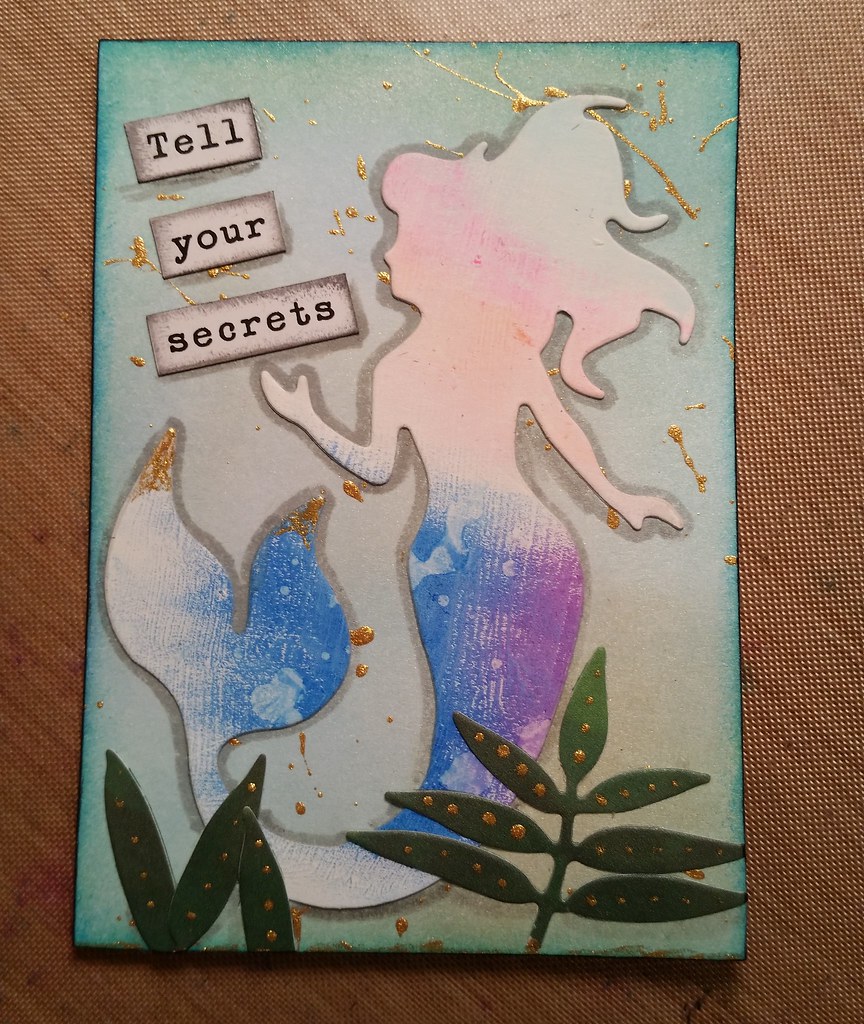
I've done several Instagram ATC swaps and having so much fun! This is my latest, which will be going out to jolly old England. I borrowed Dawn's mermaid die-cut and used some scratch watercolor paper on which I was trying different art crayons. I feel like there's something missing, but at this point, I'm afraid I'll mess it up. Plus I have to decorate an envelope in which to mail it, so I'm calling it done.
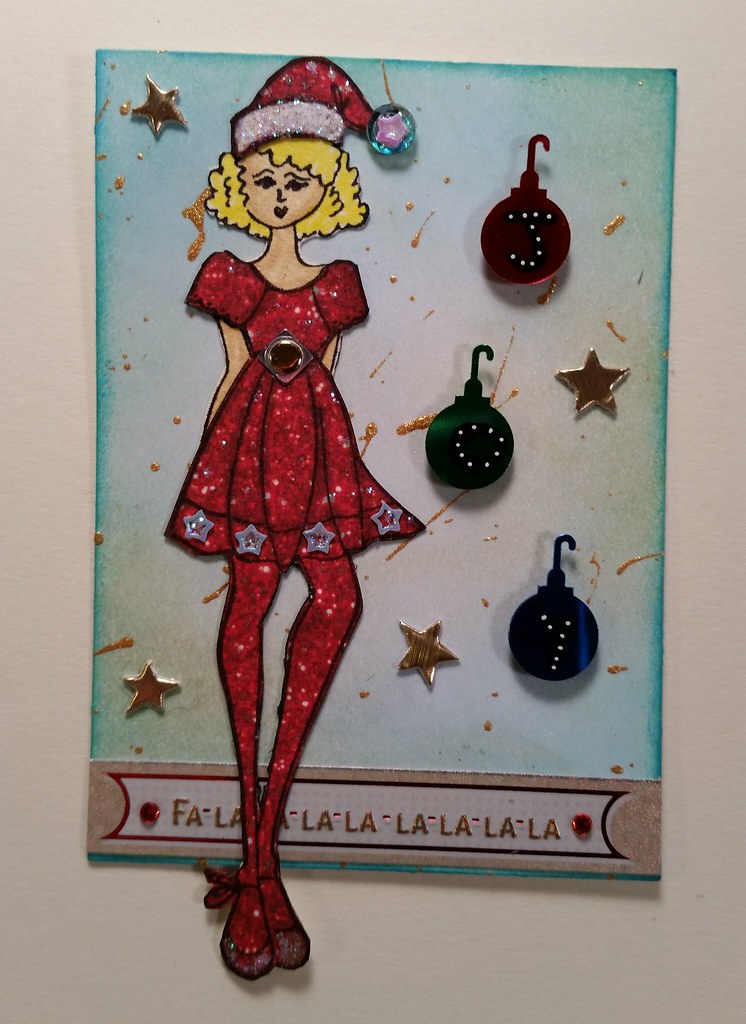
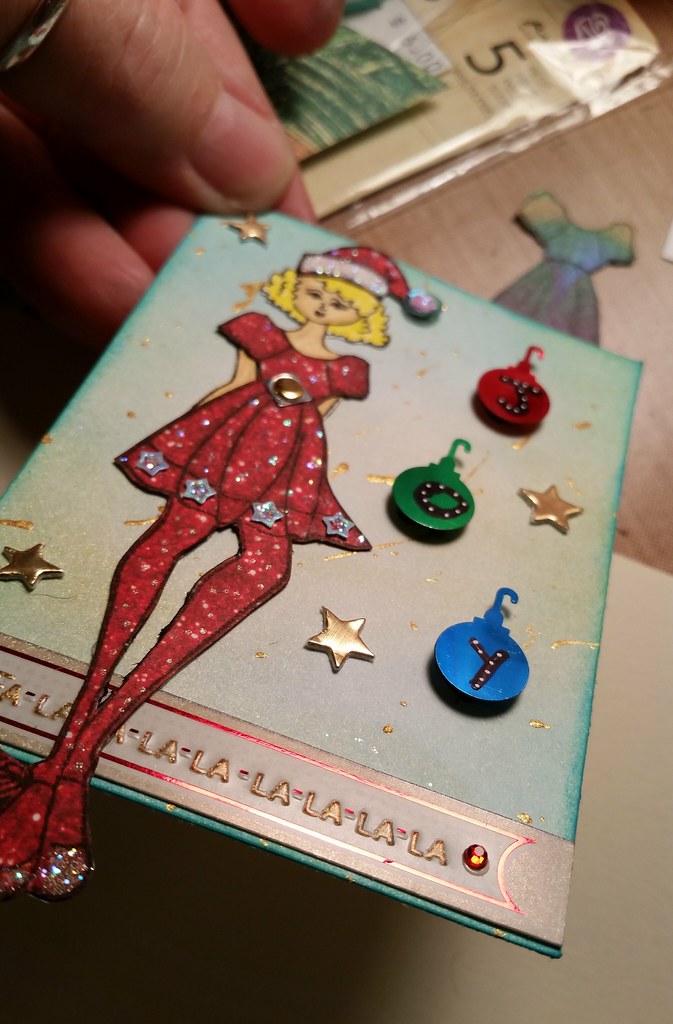
I belong to a Facebook paper doll crafting group that consists mostly of making Julie Nutting paper dolls. I joined their Christmas ATC swap and will find out who my partner is at the end of this week. This is the ATC I made using one of the smaller Christmas sets by Prima. I wrote JOY on the Christmas ornament confetti, but it was a challenge to photograph.
I'm working on a few other things, mainly my ornaments for our annual ornament swap, which is this Saturday! I've never cut it so close, but I didn't like any of the ideas I was considering. I finished the prototype last night around 1:00 a.m. I'm still not feeling it like I usually do, but maybe it'll grow on me. Happy holidays have begun!
Showing posts with label Julie Nutting. Show all posts
Monday, November 7, 2016
Sunday, April 3, 2016
We Attended A Julie Nutting Class!
...and it was so much fun!
My daughter Dawn and I took a Julie Nutting class at what turned out to be a very yummy scrapbooking store, The Island's Creative Escape (you can also find them on Instagram), about an hour's drive away from us. I was so excited to meet one of my all-time favorite crafting gurus, Julie Nutting, and I was not disappointed.
We brought a tote full of things I thought we'd need like adhesives, markers, colored pencils, ink pads, scissors, and whatever else I could fit into it, Julie and the store provided the rest.
Dawn and I were the first ones there, so we sat, where else, but right next to Julie! The kits she put together were filled with all sorts of embellishments, her printed cardstock, chipboard and other stickers. She even supplied the paint so we could paint the outside our little shelves.
At first Julie was taking us step by step and we were a little nervous about keeping up and doing everything exactly as she did. But after awhile we were all pretty much on our own and doing things however we wanted. Julie walked around the table as best she could (her back was giving her a lot of pain), talking to everyone.
Dawn felt she was out of her element with all of the fussy-cutting and embellishment work, but she did a great job, even though her carpal tunnel was acting up. She's a trooper.
I'm glad we brought two paper cutters because every square needed some adjusting before being glued in place. We appreciated having the basic forms to start with, I'm sure that was a lot of prep work. Actually, we appreciated the work that went into putting together the entire kit, it was fabulous.
And here we are, with Julie Nutting herself! She was so accommodating about pictures with us and our finished project.
There are some things I would have done differently with a few of the squares, but I'm pretty pleased with myself. I especially like that we remembered to bring photos of our dogs to incorporate them into our little shelves. I also like that bit of yummy fabric at the top from Julie's fabric line.
I was able to pick up all of the new Julie Nutting paper doll stamps as well as a paper pack and few extras. Aren't they adorable?!
If you ever have a chance to take a class like this, do it! It's loads of fun and you'll have a new made-by-you piece to display when you get home. And bragging rights for having met such an awesome crafter!
Disclosure – This post contains affiliate links, which means that at no cost to you, I may make a tiny commission if you decide to make a purchase. The products I link to are those that I believe in, regardless of any commission I may make from them. My goal is to help you easily find the tools, products, or other items that you will need to complete your project.
Saturday, January 23, 2016
Fangirling Much!
THE Julie Nutting, designer of a Prima paper doll line, liked one of my posts on a paper doll Facebook group!!
And I appreciate all of the love from my fellow craft peeps as well. I don't post on there for accolades, I post because I'm excited about these paper doll stamps and I love sharing and seeing everything about them. It encourages me to go that extra step with each one I make.
Disclosure – This post contains affiliate links, which means that at no cost to you, I may make a tiny commission if you decide to make a purchase. The products I link to are those that I believe in, regardless of any commission I may make from them. My goal is to help you easily find the tools, products, or other items that you will need to complete your project.
Saturday, January 16, 2016
YES!
Journal 52, Week 2: Yes or No
On 2"x2" cardstock, gesso, tissue paper, stamped with
Stamping Bella's Uptown Girl, Betty Loves Books, colored with colored pencils and inked
We have the choice of two prompts, and this week it was Yes or No. I chose YES...to more reading in 2016. I have So. Many. Books. Piles of books are waiting to take me away, and I am determined to shorten the stacks by reading and actually letting them go when I'm finished.
In my last post I included pictures of a Julie Doll tag I made for a swap. This is how I packaged her, with junk mail! Dawn received an offer for a credit card and when I saw the packaging I knew this lovely lady would fit right in it. I also included a few embellishments, so along with the doll, they showed through the windows.
I spritzed some ink on the mailer and added some Washi tape around it. The paper doll was positioned to peek out of the actual mailer, which excited me to no end. I'm tickled with the way this turned out, and so was the person who received it.
I'm not sure how many of these trades I'll do in the future, but the two I've done sure were a lot of fun.
Disclosure – This post contains affiliate links, which means that at no cost to you, I may make a tiny commission if you decide to make a purchase. The products I link to are those that I believe in, regardless of any commission I may make from them. My goal is to help you easily find the tools, products, or other items that you will need to complete your project.
Sunday, January 3, 2016
Paper Doll and Art Journaling In Miniature
I'll never grow up.
I love playing with these Julie Nutting
paper doll stamps! This one's for another swap and her name is Audrey
. I can't wait to see what my partner sends me.
Aaaand, I'm in! Going through my 2015 art journal affected me in an unexpected way, so it encouraged me to keep on keepin' on. This is my first Journal52 2016 prompt, "Word Of The Year." Going to literally be doing a little each week. *snicker*My daughter Dawn suggested I use Project Life cards, both small and large, because I wanted to go smaller and less complicated. Then she suggested this 2"x2" format and I was immediately enamored with this idea. Making my first one validated that feeling.
Dawn even gave me a little binder with sleeves that was made for photos this size. I'm still contemplating on how I'll be altering the cover. What I really like is that the binder allows me to expand entries to 2"x4" or 4"x4" if I'm feeling extra artsy fartsy. Sometimes I get in that zone and don't want to stop, so this pleases me immensely.
Here's to another year of crafting and making the world a happier place in which to live.
Disclosure – This post contains affiliate links, which means that at no cost to you, I may make a tiny commission if you decide to make a purchase. The products I link to are those that I believe in, regardless of any commission I may make from them. My goal is to help you easily find the tools, products, or other items that you will need to complete your project.
Tuesday, December 15, 2015
Celebrate Your Uniqueness
I recently joined a couple of Julie Nutting paper doll groups because I like this stamp line so much. I enjoy seeing what other people do with them and use those ideas as inspiration to make my own. I jumped right in and volunteered for two swaps, this one, which I'll mail this week, the other, a January swap.
I wanted to make a galaxy-like background for this doll I had in my stash of already made dolls. So I chose my Color Burst concentrated powder to see what they could do.
I spritzed the watercolor paper tag with water then sprinkled on each color. There was a lot of water and color, so I needed to soak some up, but I didn't want to mess with the design. So I took my embosser and hit it with some heat to set the color. It was still pretty wet, so I layed a piece of multi-media paper on top of it and rubbed, which resulted in a pretty cool pattern on both pieces of paper. I'll use the extra piece in another project.
I blended regular watercolors to cover the white spots, and splattered gold, white and black paint. When everything was dry, I edged it with black Staz-On ink and added tiny little dots of sparkly Stickles.
The circle and swish lines she's standing on were cut with Dawn's new die set, which I absolutely love. I glued them in place with Glossy Accents and inked and glued down the lettering as well. I was going to tie ribbon at the top of the tag, but I decided that I like it without it.
I want to stamp the envelope I'm sending this in, so I'll get that done next and then off she goes! I'll sweat it out until I hear from my swap buddy, but I'm sure she'll like it. Not gonna lie, this is difficult to let go of, but I can't keep them all.
I wanted to make a galaxy-like background for this doll I had in my stash of already made dolls. So I chose my Color Burst concentrated powder to see what they could do.
I spritzed the watercolor paper tag with water then sprinkled on each color. There was a lot of water and color, so I needed to soak some up, but I didn't want to mess with the design. So I took my embosser and hit it with some heat to set the color. It was still pretty wet, so I layed a piece of multi-media paper on top of it and rubbed, which resulted in a pretty cool pattern on both pieces of paper. I'll use the extra piece in another project.
I blended regular watercolors to cover the white spots, and splattered gold, white and black paint. When everything was dry, I edged it with black Staz-On ink and added tiny little dots of sparkly Stickles.
The circle and swish lines she's standing on were cut with Dawn's new die set, which I absolutely love. I glued them in place with Glossy Accents and inked and glued down the lettering as well. I was going to tie ribbon at the top of the tag, but I decided that I like it without it.
I want to stamp the envelope I'm sending this in, so I'll get that done next and then off she goes! I'll sweat it out until I hear from my swap buddy, but I'm sure she'll like it. Not gonna lie, this is difficult to let go of, but I can't keep them all.
Labels:
color burst,
crafts,
Julie Nutting,
paper dolls,
swap
Monday, March 30, 2015
Paper Towns
As you can see, I'm still in love with Julie Nutting's paper doll stamps. I spent a few days working on getting multiple stampings of each one, then dressing them up by fussy-cutting patterned paper. I colored a few areas and topped them off with touches of Glossy Accents. It's nice to have them ready for cards I'll be making or for scrapbooking.
Thank you, Dawn, for spoiling me with my new stamps!
Sunday, August 17, 2014
Stamping, Crocheting and Doggies In The Window
Dawn surprised me with new Julie Nutting stamps! I stamped and stamped and then cut out a few. I can't wait to see what they'll wear.
I'm still purging stuff from my craft room and came across some things I haven't seen in years. I crocheted this collar and can't believe I used to do such delicate work.
Molly and Clover at our front window (Winnie is usually there, too). Sure makes it difficult to go anywhere.
I'm still purging stuff from my craft room and came across some things I haven't seen in years. I crocheted this collar and can't believe I used to do such delicate work.
Molly and Clover at our front window (Winnie is usually there, too). Sure makes it difficult to go anywhere.
Thursday, April 3, 2014
Cards, Tags and Punches
I was excited to use one of my newer Julie Nutting paper dolls, but when I got paid for it, well, yipee!
My faces are improving!
This sympathy card was for an on-line friend who lost their brother. I know how that feels.
A life-long friend had birthday, which is a lot to celebrate because she's going through some health stuff right now. She likes The Wizard of Oz as I do, so I eluded to it by putting this darling little La-La Land stamped paper doll in blue gingham on a red poppy background.
I wouldn't normally point out someone is another year older, but we're celebrating her life, so...
My daughters recently came home from a trip with lots of PJs and clothes they found at an awesome Walmart sale. Being the hoarder that I am, I saved some of the tags because, tags.
I covered them in gesso and white paint, ran them through my die cutter inside embossing folders then went to town painting them with all sorts of inks and paint. I sealed them with matt-finish Mod Podge because I like the finish and feel it gives to the paper. I'm going to add eyelets at the top when I go to use them.
My daughter bought me a balloon punch (inspired by how much I liked the balloons paired with the Julie Nutting doll above), so I punched some scrap paper from other projects. It made quite the variety and now I have tons to choose from.
Instead of shoving them in a 12"x12" as usual, I now have a binder filled with clear sheets with different sized pockets. This way I can see exactly what I have and (hopefully) use them more.
I'm not sure what I'll do with those tags, but they sure were a lot of fun to make!
My faces are improving!
This sympathy card was for an on-line friend who lost their brother. I know how that feels.
A life-long friend had birthday, which is a lot to celebrate because she's going through some health stuff right now. She likes The Wizard of Oz as I do, so I eluded to it by putting this darling little La-La Land stamped paper doll in blue gingham on a red poppy background.
I wouldn't normally point out someone is another year older, but we're celebrating her life, so...
My daughters recently came home from a trip with lots of PJs and clothes they found at an awesome Walmart sale. Being the hoarder that I am, I saved some of the tags because, tags.
I covered them in gesso and white paint, ran them through my die cutter inside embossing folders then went to town painting them with all sorts of inks and paint. I sealed them with matt-finish Mod Podge because I like the finish and feel it gives to the paper. I'm going to add eyelets at the top when I go to use them.
My daughter bought me a balloon punch (inspired by how much I liked the balloons paired with the Julie Nutting doll above), so I punched some scrap paper from other projects. It made quite the variety and now I have tons to choose from.
Instead of shoving them in a 12"x12" as usual, I now have a binder filled with clear sheets with different sized pockets. This way I can see exactly what I have and (hopefully) use them more.
I'm not sure what I'll do with those tags, but they sure were a lot of fun to make!
Subscribe to:
Posts (Atom)