Showing posts with label butterflies. Show all posts

Sunday, August 14, 2016

Butterflies Galore!

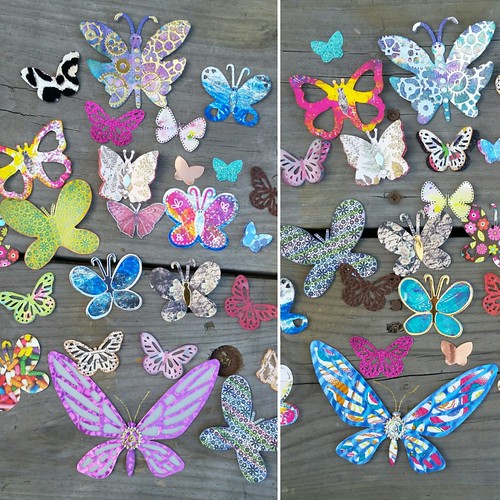
I recently revisited Swap-Bot and signed up for a butterfly swap. We were to make 20 butterflies for two partners, so a total of 40 butterflies were made. They could be punched, die-cut or hand-cut, and could all be the same shape, but they all had to be from different paper or prints. Of course, I went overboard, but it was so fun!


IMG_20160725_085429
I wonder what my partners will do with all of their butterflies?

20160713_161929
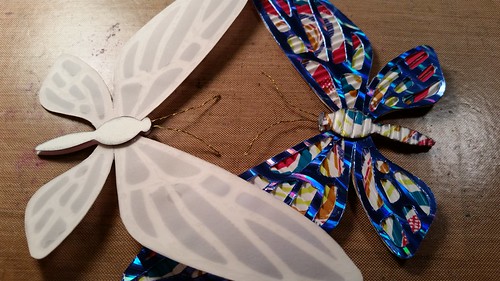
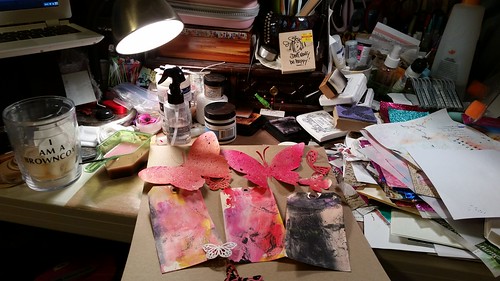
The other side of the butterfly on the left (above) is pink instead of blue, and is backed with vellum. They're cut from a Tim Holtz die and they are huge.


20160709_201145
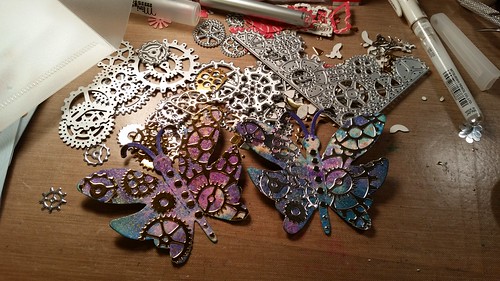
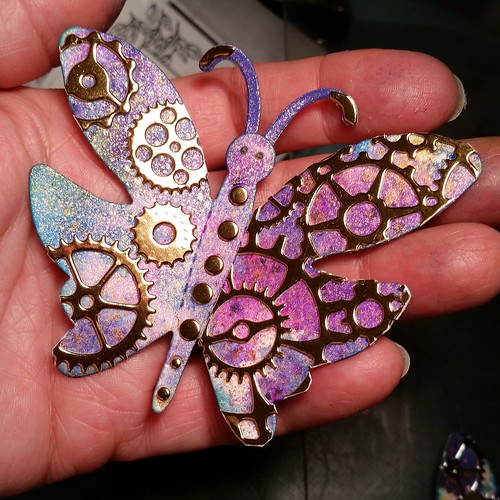
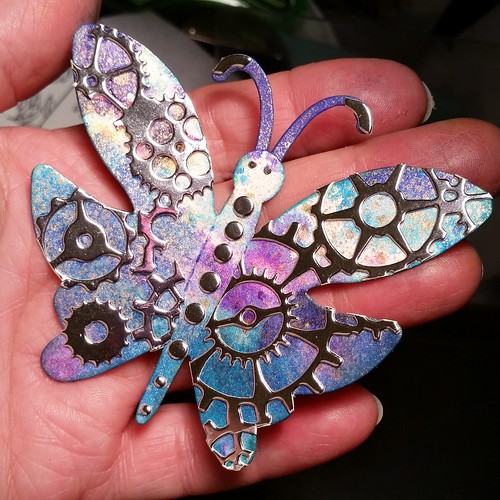
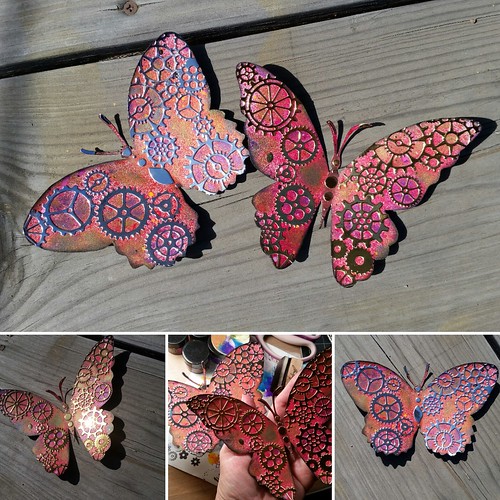
These are steampunk-ish palm-sized butterflies, my favorites.
IMG_20160709_205739
See? So big! I spritzed them with Distress and Dylusions ink and glued gears cut from metallic cardstock onto the wings. In person, it really does look like metal.
IMG_20160709_203810
I don't know why I haven't made myself one of these!
20160712_221318
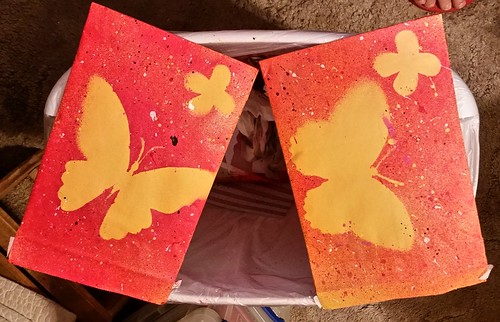
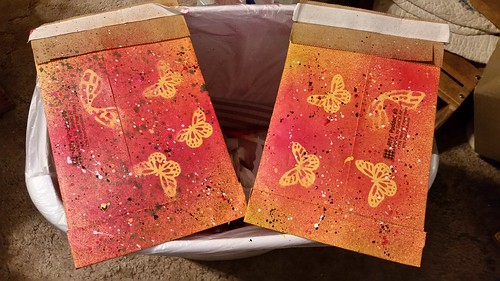
For the envelopes, I cut out two large butterflies from a coloring book I found at a thrift store, and placed them on the front of the envelopes as masks while I spritzed ink all around them. I placed smaller butterflies where the return address should be.


20160712_221454
I like how the fronts turned out, the backs could have been better.
20160712_220819
I received 40 butterflies from the Swap-Bot swap, mostly the size of the smallest ones I did, and I'm very happy with them. When I swap with someone, I mostly think about the giving, not the getting. So when it dawned on me I was going to get 40 butterflies, I was a little worried about where I was going to put them all. It's fine, they're in with my cut dies and I've already used a few of them on a project. This was a fun swap that I enjoyed immensely. 


IMG_20160714_165404
I liked the steampunk-ish ones so much, I took the butterflies I used as masks on the envelopes and did the same technique on them. I had originally intended to throw them away, but after seeing them with all the ink spritzed on them, I just couldn't. I'm glad I didn't! I'm sending them to a couple of Instagram buddies, but they don't know it yet. They're huge, and I'm not sure what my two Instagram buddies will end up using them for, but they commented on how much they liked them, so I thought I'd surprise them by sending them each one.

Be careful when you tell me you like something I've made, you just might end up with it.


Thursday, March 3, 2016

Cardboard Butterfly Challenge


Enter Eye Connect Crafts'
March Design Challenge!

My friend Donna Berlanda, who is such an encourager, posted a link to this contest over on the Eye Connect Crafts site as a Facebook comment for my postcard butterflies. The rules are you have to make something out of chipboard or cardboard. I thought, Donna knows me well, it's right up my alley!

I dug into my stash of cardboard and stamped it with the large butterfly with text background that came in Inkadinkado's cling stamp set called Insect Amalgam Cling Set #60-60219 (link at the bottom). As you can see, it's a very good-sized stamp. It's what makes it so fun to color with the Gelatos and other watercolor crayons.
Inkadinkado Insect Amalgam Cling Set #60-60219

After stamping, I painted on a couple of coats of Glue N' Seal by Ranger. This seals the surface and allows the Gelatos to move and blend smoothly. I trimmed away the blank margarine and ended up with a piece approximately 6"x6" inches. I roughed up the edges by running the blade of my scissors across them. It gives them the natural look I like so much.


I cut a larger piece of cardboard and gave it a couple of coats of Glue N' Seal as well. I stamped it with the text part of the butterfly stamp, tricky, but it worked. I took a black Gelato and drew a square where the butterfly would be placed, then blended it out so it gave it depth after the butterfly piece was in place.

I cut a small square of corrugated cardboard and backed the butterfly with it, then attached that to the piece of cardboard with stamped texted. The corrugated piece was added to pop it up some so it would stand out better after framing.


My daughter Valerie gave me a shadow box with a black frame (thank you, Val!) for me to frame everything.

I didn't care for the fuzzy black background of the frame, so I tore it off and sanded the backboard, gave it a coat of white gesso and a couple of coats of parchment-colored acrylic paint.


When everything was dry, I put adhesive and foam squares on the back and adhered it to the frame backboard.

Here's my finished butterfly! I photographed it on my desk and in my back yard in several areas to try and place it in a good light. But what I ended up doing was only confusing myself because I can't decide which one I like best. Ha!


It's difficult to convey the depth of the shadow box.

My father made this pagoda in the 1970s for one of my best friends' parents. (We were in the ceramic business at the time.) After her mother passed away, she gave it to me. I love having it in the yard. And when the tiny light bulb isn't out, it glows a nifty green.


I'm off to enter the contest. Wish me luck!


Disclosure – This post contains affiliate links, which means that at no cost to you, I may make a tiny commission if you decide to make a purchase. The products I link to are those that I believe in, regardless of any commission I may make from them. My goal is to help you easily find the tools, products, or other items that you will need to complete your project.

Tuesday, March 1, 2016

Butterfly In The Sky...

Bet you're singing the Reading Rainbow song, aren't ya?
I have had this stamp for a while now, but I never knew what to do with it. So I took it out and stamped a few images onto mixed media paper and decided Gelatos and other watercolor crayons might be fun to use.
I was right, I absolutely loved making these! I put a coat of Glue N' Seal on them because it allows for blending. Without sealing it, (depending on the paper), they just don't move around well enough to get these results. You can seal your paper with any type of decoupage medium such as Mod Podge or Deco-Page. I prefer a matt finish, but glossy would work just as well.
When they were finished I realized they'd make great postcards, so I backed them with cardstock, drew a line down the middle and did a little stamping.


You can see the mixture of watercolor crayons I used below. I probably have too many.

It's rare I do a craft over and over, unless it's for a specific group project. But I enjoyed making these so much, I'm going to make another set.


Disclosure – This post contains affiliate links, which means that at no cost to you, I may make a tiny commission if you decide to make a purchase. The products I link to are those that I believe in, regardless of any commission I may make from them. My goal is to help you easily find the tools, products, or other items that you will need to complete your project.


Tuesday, December 8, 2015

Watercolored Butterflies

When I'm in the mood to craft but I don't know what I want to make, I'll usually break out the watercolors or some type of mixed media project like the playing cards I've been working on. The other night I brought out my good set of watercolors, the set my daughters surprised me with. They're so yummy! Can you see the shimmer of the silver? Magic.

Tonight I tried out a new set of butterfly stamps on the watercolor paper. I stamped the dotted image on parts I thought would make pretty butterflies then cut them out. They're lovely.

I don't always know what I'm going to do with the stuff I make, but it always comes in handy.


I love how imperfect they all are.

These will probably end up on a card or in one of my art journals. They would make sweet little magnets, but they wouldn't be practical, just for looks. I had to stop myself from making tons more.

Friday, March 30, 2012

Seven Easter Cards


It took an entire day to make these cards, not even kidding. I work out of plastic 12”x12” storage containers (they’re all labeled, so it’s not total chaos) that are kept in a closet, and, man, they were spread every which way. One of the craft YouTubes I watch suggested sketching out your cards before making them, so I put pencil to pad and kind of did that. I even listed some of the “ingredients” I had to work with and it helped me to focus on the things I’d need to make my cards.

I don’t normally send out Easter cards, but I had it in my mind I wanted to do that for a few people this year. Crafting is like therapy for me, so yesterday was like a good ol’ shot in the arm. Thinking about each person as I created something just for them lifted my spirits and left me feeling very loved.

For descriptions and close-ups my flickr has it all.

Sunday, February 8, 2009

Butterflies and Craftster

Some of you know about Craftster, but for those who don't it is a
place where people gather to share what they've crafted, be it sewing,
jewelry-making and everything in-between. We even do craft swaps,
where people makes things (such as Oz stuff, that one was fun) and
swap with a partner that's assigned to you. Anyway, according the
Craftster.org, there are, literally tens-of-thousands of projects posted
each year on this site, so you can imagine how excited I am about
sharing this with y'all.

The big news I'm soooooooo excited about?!


One of my projects was amongst Crafter's Best of 2008! I posted
pictures of a butterfly coil pot and a couple of pinch pots I made in
a ceramics class I took a while back, and low and behold it was chosen
as one of the top 5 projects amongst the "POTTERY, CERAMICS, POLYMER
CLAY > Pottery, Ceramics, etc: Completed Projects" category.

I'm not sure if this link will work, but here 'tis. Scroll down until you reach the pottery category and you'll see my butterfly pot. I am so excited that one of my pieces is worthy of this honor and I am giddy as a little girl!!!


This the award Valerie made for me, isn't it the bomb?! It's a replica of the little icon on Craftster and it's spot-on! Thank you, Valerie, for making me feel so special!